Appearance
Editing OCR Text
One of Mokuro Library's core features is the ability to correct OCR text and save your changes directly back to the .mokuro files on your server.
IMPORTANT
Your changes are not saved automatically. You must click the Save button in the top toolbar to make your edits permanent.
The Editing Button
To begin editing, click the Edit Mode button in the header (next to the settings button).
This single button cycles through three editing modes:
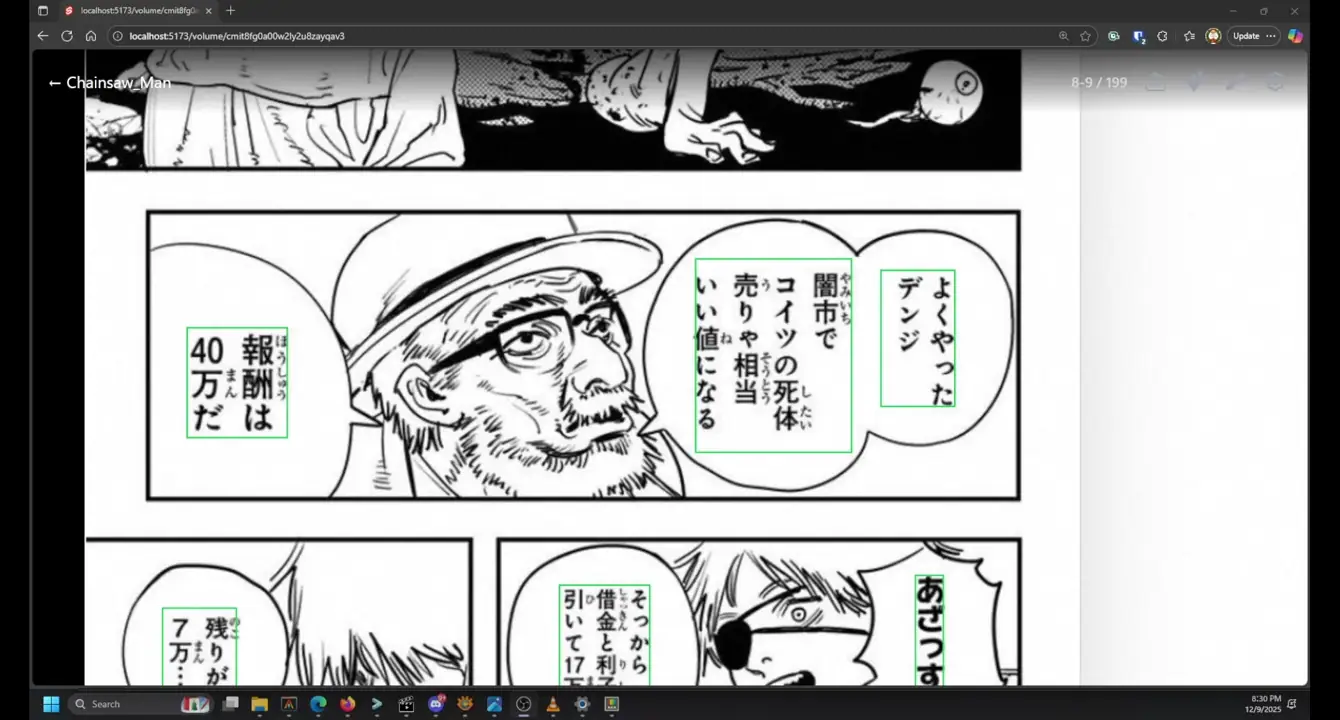
- 📖 Read Mode (Default): Normal reading with selectable OCR text overlays on hover.
- 📦 Box Edit Mode: Move and resize text blocks and lines. Double-click any line to switch to Text mode.
- ✏️ Text Edit Mode: Edit text content directly. Click empty space or start dragging to return to Box mode.
Additionally, there's a separate Smart Resize button (⭐) that can be toggled independently to automatically adjust font sizes.
MODE SWITCHING
The editor intelligently switches modes based on your actions:
- Double-click a line in Box mode → switches to Text mode for that line
- Start dragging a line in Text mode → automatically switches to Box mode
- Click empty space in Text mode → returns to Box mode
1. Text Edit Mode
When this mode is active:
- Click on any line of text to place your cursor and begin typing.
- Pressing
Enterin the middle of a line will split it into two new lines. - Pressing
Backspacein the beginning of a line will merge it into the previous line. - Use your arrow keys to navigate between adjacent lines.
- Horizontal Blocks: Use
ArrowUpandArrowDown. - Vertical Blocks: Use
ArrowLeftandArrowRight.
- Horizontal Blocks: Use
QUICK TIP
Double-click any line in Box mode to instantly switch to Text mode and start editing that line.
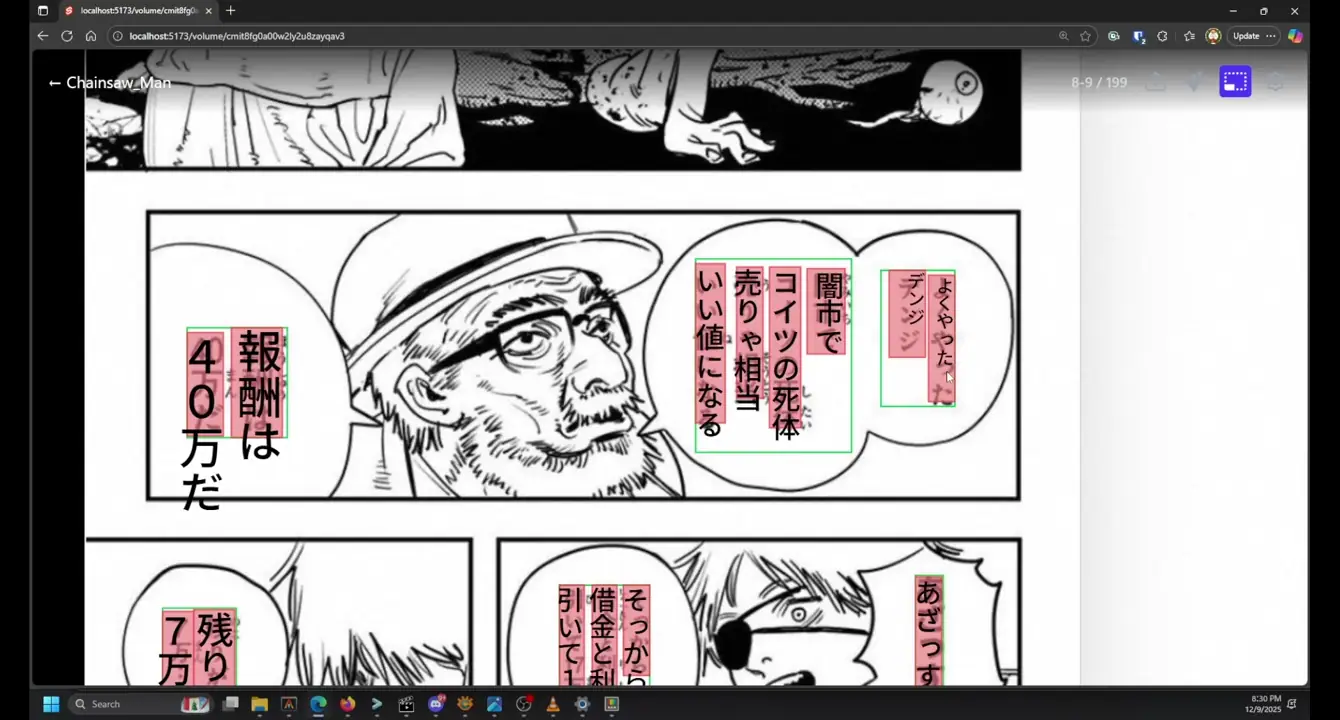
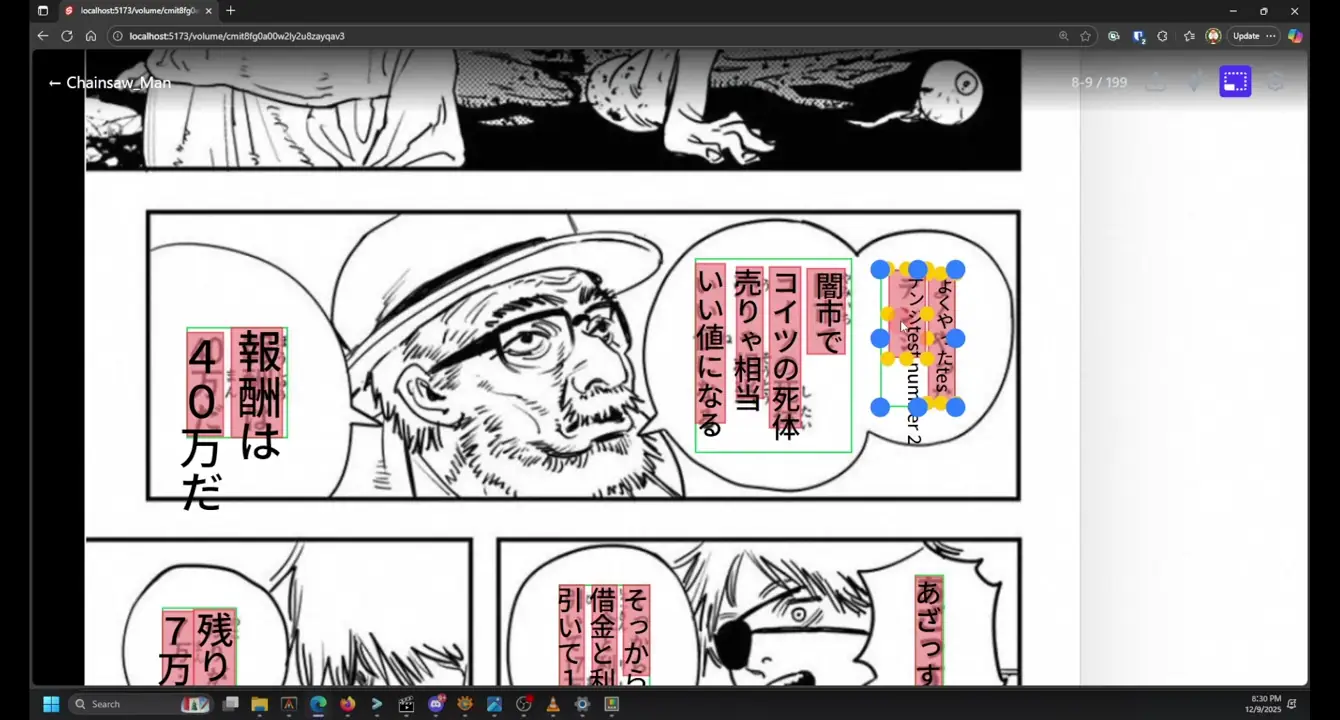
2. Box Edit Mode
When this mode is active, you can manipulate the bounding boxes.
- Move: Click and drag the body of a box to move it.
- Outer Box (Blue): Drags the entire block (including all lines inside it).
- Inner Box (Red/Yellow): Drags just that specific line.
- Resize: Click and drag the 8 handles on any box to resize it.
QUICK TIP
Double-click any line to instantly switch to Text mode and start editing the text content.
3. Smart Resize Mode
This is a powerful helper mode that automatically adjusts font size to fit text within its bounding box.
You can activate this independently of Read/Box/Text modes. It will automatically run when you:
- Resize a box using the drag handles.
- Type or edit text content.
You can also manually trigger it by:
- Activating only Smart Resize Mode (keeping the editor in Read mode)
- Double-clicking any line to recalculate its font size

4. Adding & Deleting Content
You can add and delete blocks using the right-click context menu (available in both Box and Text modes).
- Add New Block: Right-click on an empty area of the page and select "Add Block".
- Add New Line: Right-click on an existing block (the blue box) and select "Add Line".
- Delete Line: Right-click on any line and select "Delete Line".
- Note: If you delete the last line in a block, the entire block will be deleted.
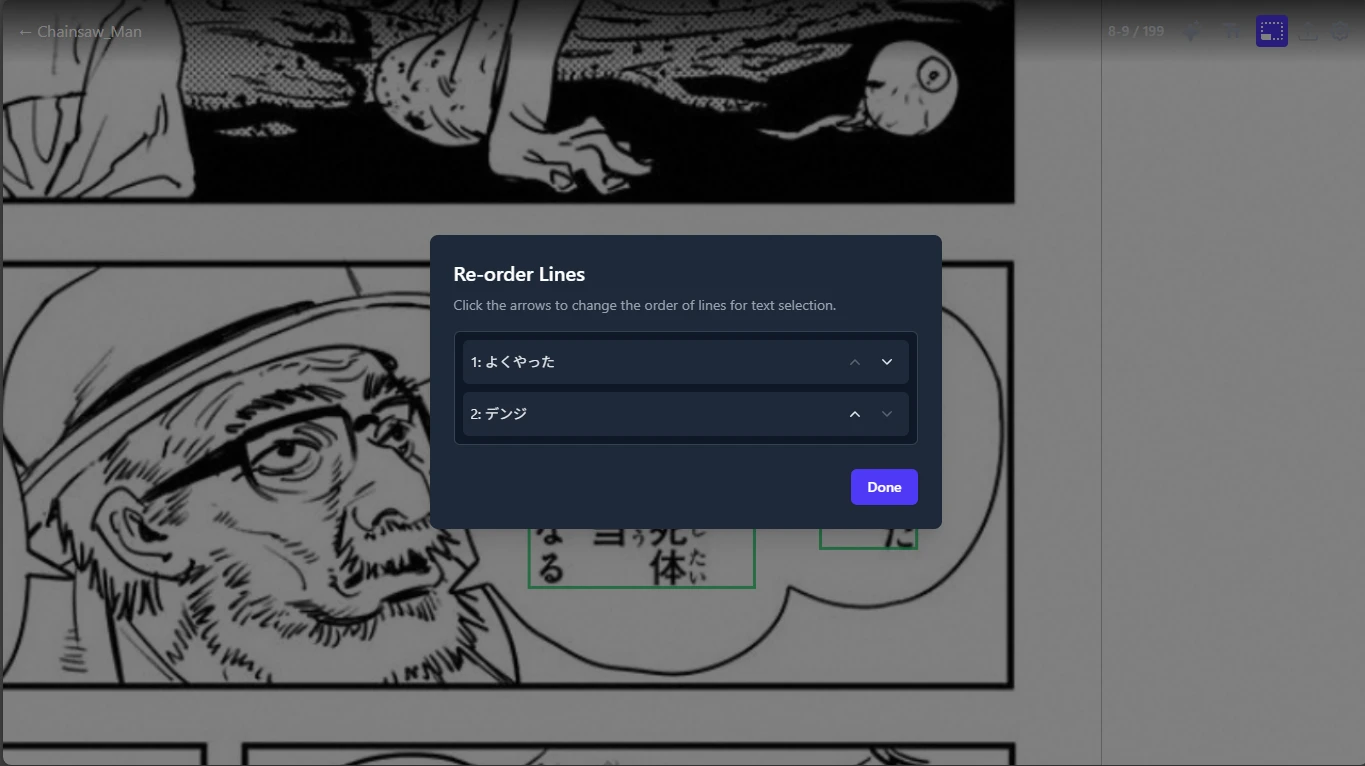
5. Re-ordering Lines
The order of lines is important for text selection and copying. If the default order is incorrect, you can change it.
- Right-click any line.
- Select "Re-order Lines...".
- A modal will appear. Use the "Up" and "Down" arrows to change the line order, then click "Close".
- Remember to click Save in the toolbar to keep your new order.